Linux
Penguin flavoured Unix.
Hosting
Oracle Cloud Hosting: Configuring default IPTables on a Virtual Machine
Applies to Ubuntu 22.04 LTS ARM64 VMs on Oracle Cloud. May also apply to x86_64 VMs and other Linux distributions too.
Despite OCI (Oracle Cloud Infrastructure) having a firewall in-front of your VM in the form of security lists, the VM itself runs its own set of iptables rules, as defined by Oracle. I came across this article which saved my sanity as I initially couldn't figure out why, despite defining the ingress rules within the OCI Security List, connections weren't going through. Turns out that they weren't defined in iptables!
Updating IPTables rules on an Oracle VM
I edited /etc/iptables/rules.v4 and added the following lines:
-A INPUT -p tcp -m state --state NEW -m tcp --dport 80 -j ACCEPT
-A INPUT -p tcp -m state --state NEW -m tcp --dport 443 -j ACCEPT
which appear at lines 12 and 13 in the snippet of the full rules.v4 file below:
# Generated by iptables-save v1.8.7 on Thu Oct 19 15:25:17 2023
*filter
:INPUT ACCEPT [0:0]
:FORWARD ACCEPT [0:0]
:OUTPUT ACCEPT [328577:1494721704]
:InstanceServices - [0:0]
-A INPUT -m state --state RELATED,ESTABLISHED -j ACCEPT
-A INPUT -p icmp -j ACCEPT
-A INPUT -i lo -j ACCEPT
-A INPUT -p udp -m udp --sport 123 -j ACCEPT
-A INPUT -p tcp -m state --state NEW -m tcp --dport 22 -j ACCEPT
-A INPUT -p tcp -m state --state NEW -m tcp --dport 80 -j ACCEPT
-A INPUT -p tcp -m state --state NEW -m tcp --dport 443 -j ACCEPT
-A INPUT -j REJECT --reject-with icmp-host-prohibited
-A FORWARD -j REJECT --reject-with icmp-host-prohibited
-A OUTPUT -d 169.254.0.0/16 -j InstanceServices
-A InstanceServices -d 169.254.0.2/32 -p tcp -m owner --uid-owner 0 -m tcp --dport 3260 -m comment --comment "See the Oracle-Provided Images section in the Oracle Cloud Infrastructure documentation for security impact of modifying or removing this rule" -j ACCEPT
-A InstanceServices -d 169.254.2.0/24 -p tcp -m owner --uid-owner 0 -m tcp --dport 3260 -m comment --comment "See the Oracle-Provided Images section in the Oracle Cloud Infrastructure documentation for security impact of modifying or removing this rule" -j ACCEPT
-A InstanceServices -d 169.254.4.0/24 -p tcp -m owner --uid-owner 0 -m tcp --dport 3260 -m comment --comment "See the Oracle-Provided Images section in the Oracle Cloud Infrastructure documentation for security impact of modifying or removing this rule" -j ACCEPT
-A InstanceServices -d 169.254.5.0/24 -p tcp -m owner --uid-owner 0 -m tcp --dport 3260 -m comment --comment "See the Oracle-Provided Images section in the Oracle Cloud Infrastructure documentation for security impact of modifying or removing this rule" -j ACCEPT
-A InstanceServices -d 169.254.0.2/32 -p tcp -m tcp --dport 80 -m comment --comment "See the Oracle-Provided Images section in the Oracle Cloud Infrastructure documentation for security impact of modifying or removing this rule" -j ACCEPT
-A InstanceServices -d 169.254.169.254/32 -p udp -m udp --dport 53 -m comment --comment "See the Oracle-Provided Images section in the Oracle Cloud Infrastructure documentation for security impact of modifying or removing this rule" -j ACCEPT
-A InstanceServices -d 169.254.169.254/32 -p tcp -m tcp --dport 53 -m comment --comment "See the Oracle-Provided Images section in the Oracle Cloud Infrastructure documentation for security impact of modifying or removing this rule" -j ACCEPT
-A InstanceServices -d 169.254.0.3/32 -p tcp -m owner --uid-owner 0 -m tcp --dport 80 -m comment --comment "See the Oracle-Provided Images section in the Oracle Cloud Infrastructure documentation for security impact of modifying or removing this rule" -j ACCEPT
-A InstanceServices -d 169.254.0.4/32 -p tcp -m tcp --dport 80 -m comment --comment "See the Oracle-Provided Images section in the Oracle Cloud Infrastructure documentation for security impact of modifying or removing this rule" -j ACCEPT
-A InstanceServices -d 169.254.169.254/32 -p tcp -m tcp --dport 80 -m comment --comment "See the Oracle-Provided Images section in the Oracle Cloud Infrastructure documentation for security impact of modifying or removing this rule" -j ACCEPT
-A InstanceServices -d 169.254.169.254/32 -p udp -m udp --dport 67 -m comment --comment "See the Oracle-Provided Images section in the Oracle Cloud Infrastructure documentation for security impact of modifying or removing this rule" -j ACCEPT
-A InstanceServices -d 169.254.169.254/32 -p udp -m udp --dport 69 -m comment --comment "See the Oracle-Provided Images section in the Oracle Cloud Infrastructure documentation for security impact of modifying or removing this rule" -j ACCEPT
-A InstanceServices -d 169.254.169.254/32 -p udp -m udp --dport 123 -m comment --comment "See the Oracle-Provided Images section in the Oracle Cloud Infrastructure documentation for security impact of modifying or removing this rule" -j ACCEPT
-A InstanceServices -d 169.254.0.0/16 -p tcp -m tcp -m comment --comment "See the Oracle-Provided Images section in the Oracle Cloud Infrastructure documentation for security impact of modifying or removing this rule" -j REJECT --reject-with tcp-reset
-A InstanceServices -d 169.254.0.0/16 -p udp -m udp -m comment --comment "See the Oracle-Provided Images section in the Oracle Cloud Infrastructure documentation for security impact of modifying or removing this rule" -j REJECT --reject-with icmp-port-unreachable
COMMIT
# Completed on Thu Oct 19 15:25:17 2023
and once saved, I simply restarted iptables:
systemctl restart iptables
And everything worked!
Setting up the Security Lists (firewall ingress/egress rules) for your Oracle VM
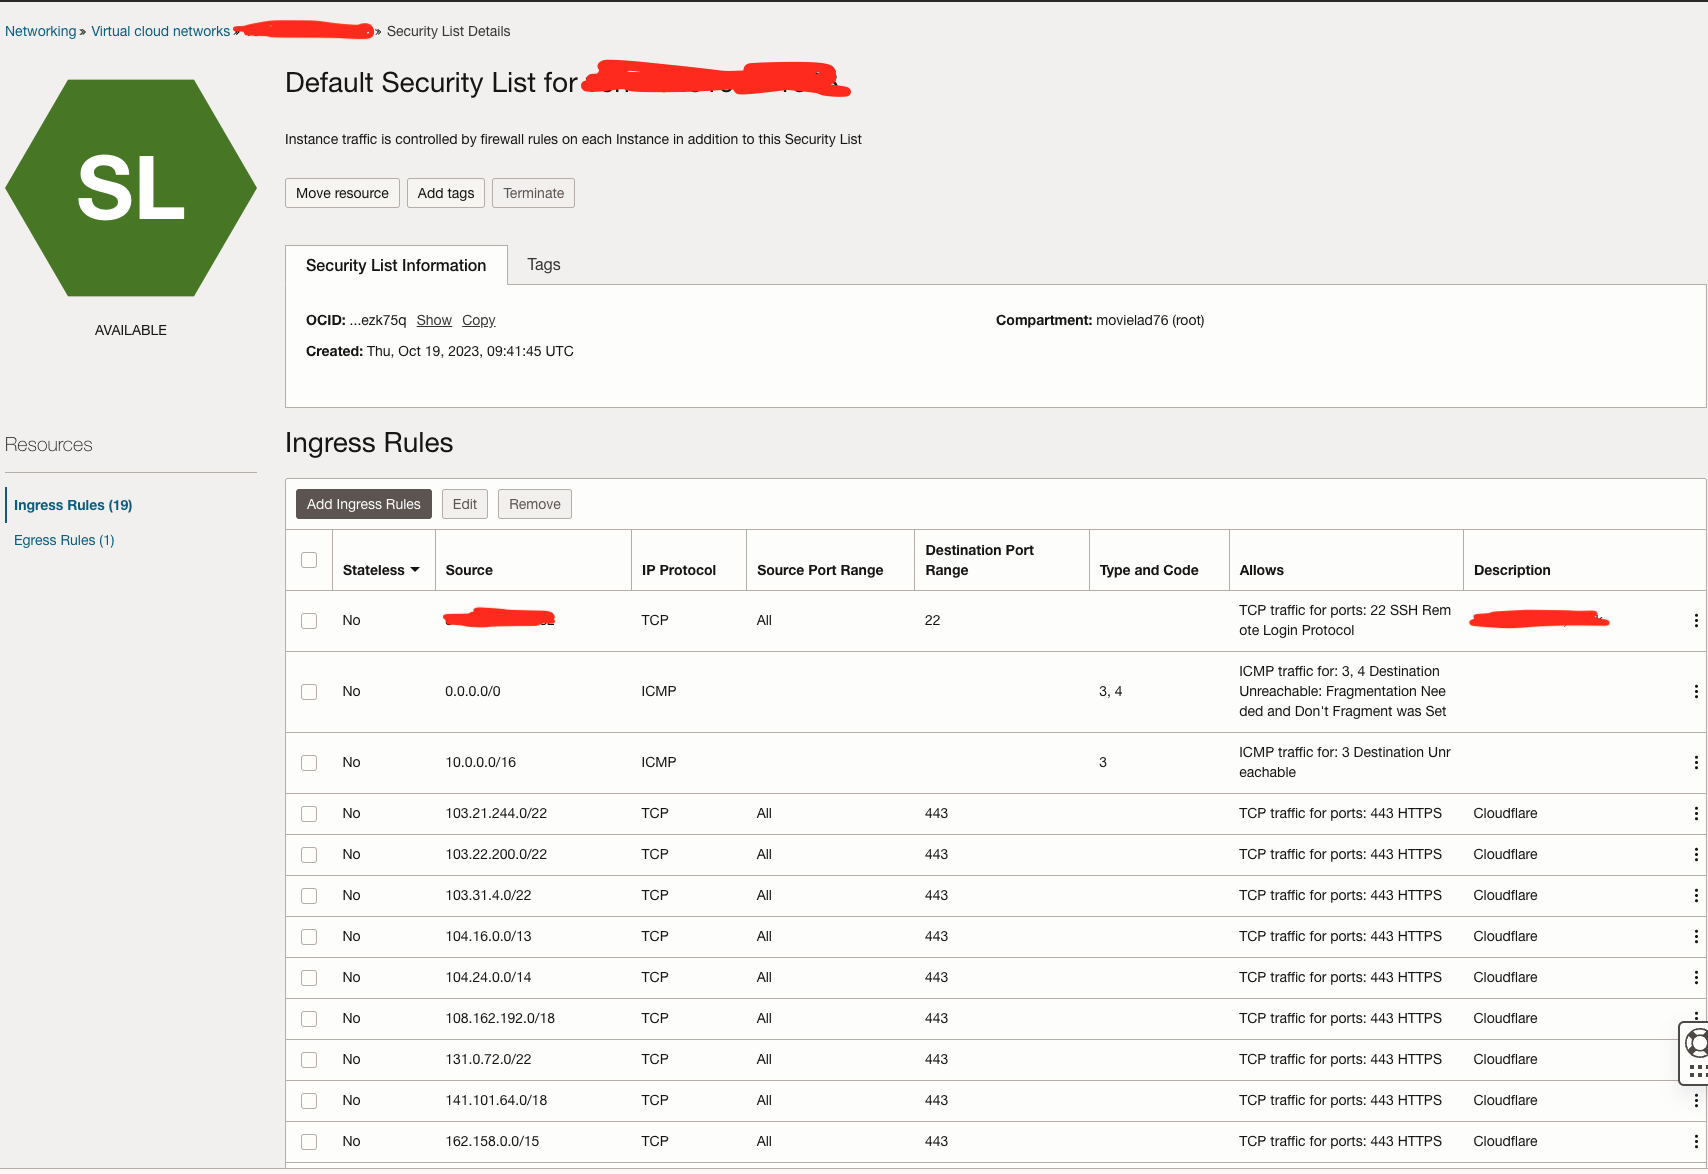
In this example, I only allow incoming SSH connections to a limited number of IP addresses, and all TLS traffic is allowed from Cloudflare IP address ranges.
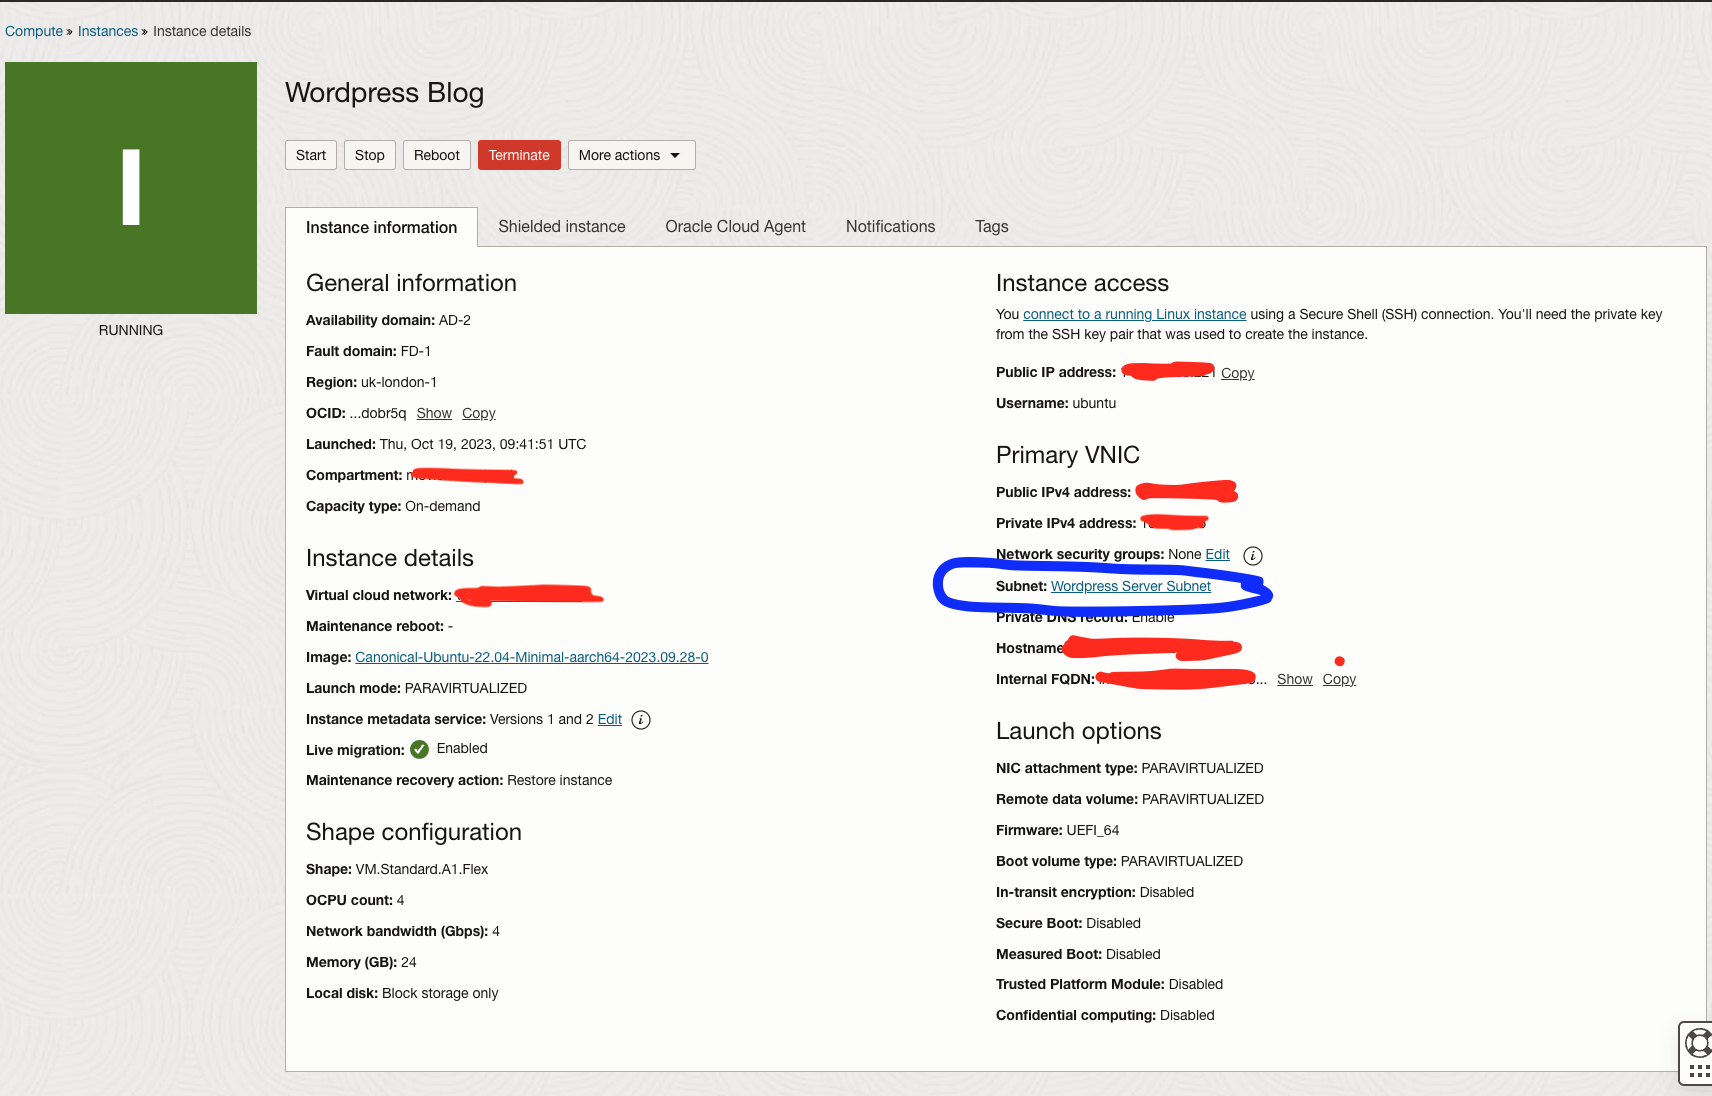
From the Instance page, click on the Subnet link (as shown in below circle):
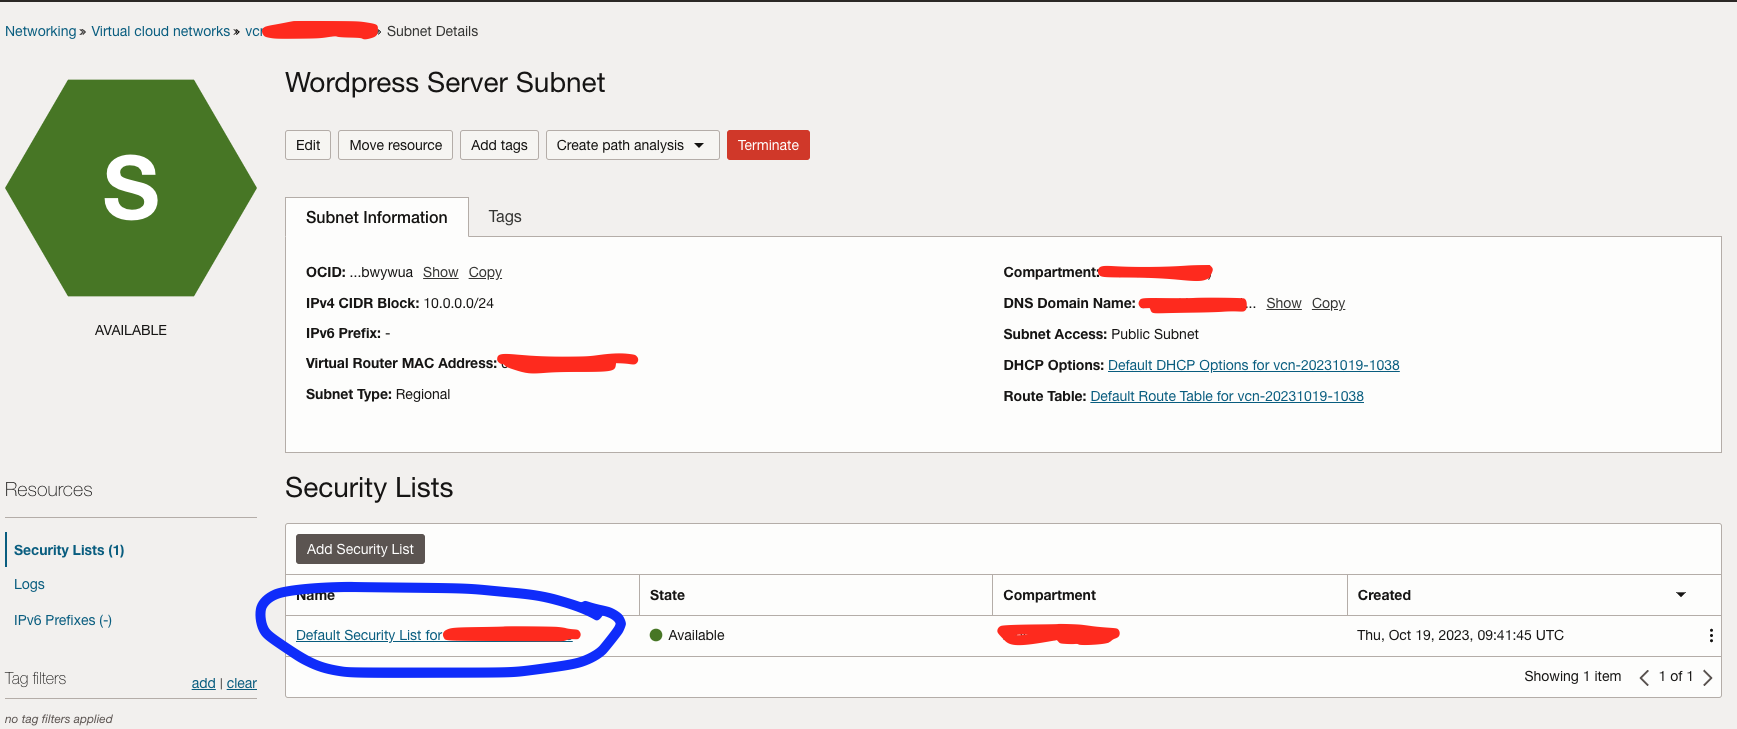
Then click the Security List name associated with it (again, in blue circle):
Now you can define your rules:
Backing up Wordpress (or any other application) to Backblaze B2
Work in progress!
Installing Backup Manager
Debian/Ubuntu
sudo apt install backup-managerCentOS/Rocky/RHEL
sudo yum install epel-release
sudo yum update
sudo yum install backup-manager
Configuring Backup Manager
Accept the defaults during installation, but afterwards, on a Debian/Ubuntu system, run:
dpkg-reconfigure backup-manager
For CentOS/Rocky/RHEL systems, you've got to amend the /etc/backup-manager.conf file. More on that later.
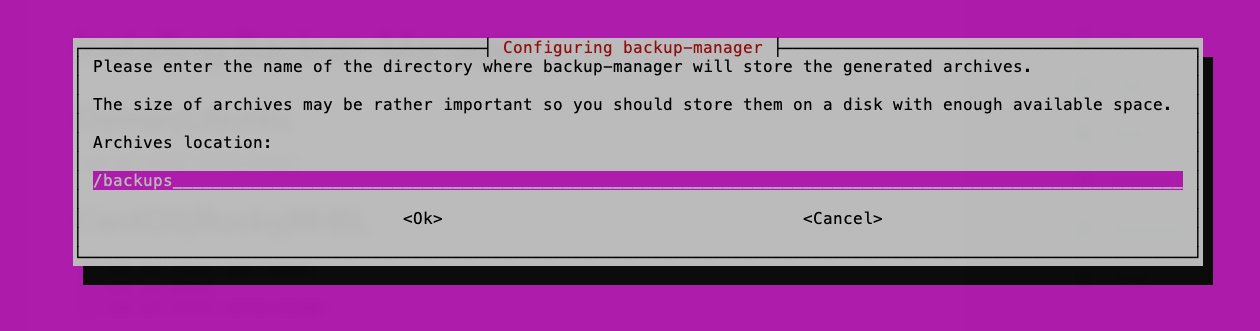
When running the dpkg-reconfigure backup-manager command, you'll see a series of screens as follows
Here you specify the location where (local) backups are stored. If your hosting provider allows you to add additional volumes, it's highly recommended you do this. In our example, we'll use a local directory called /backups.
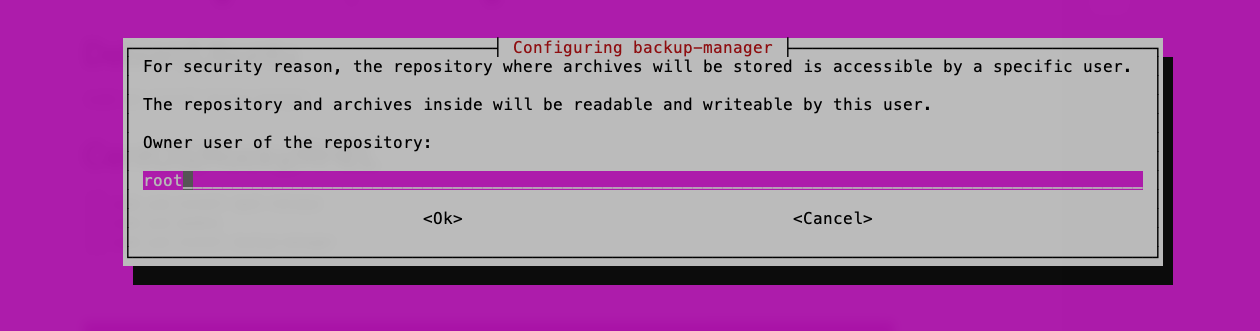
The next thing to do is to specify the ownership of that directory and the contents within it. Ordinarily this is going to be root:
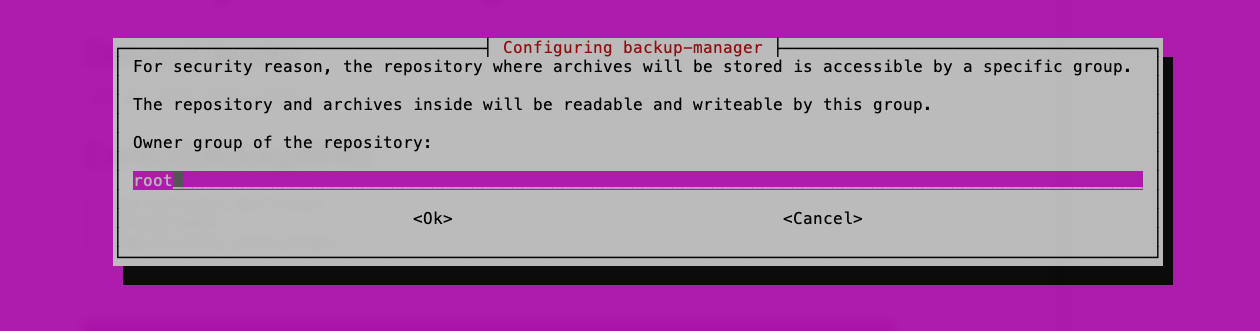
The same applies to the group too:
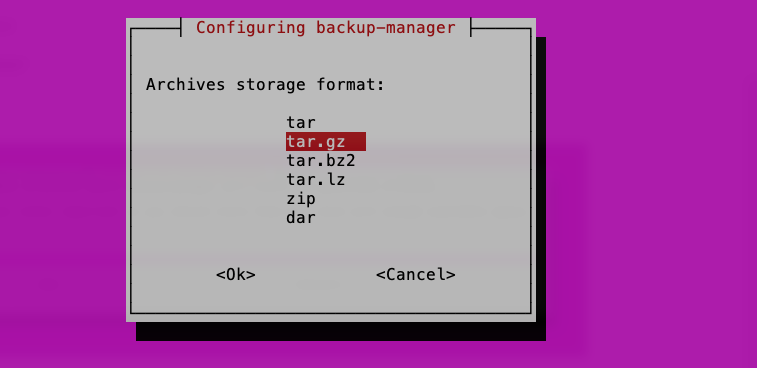
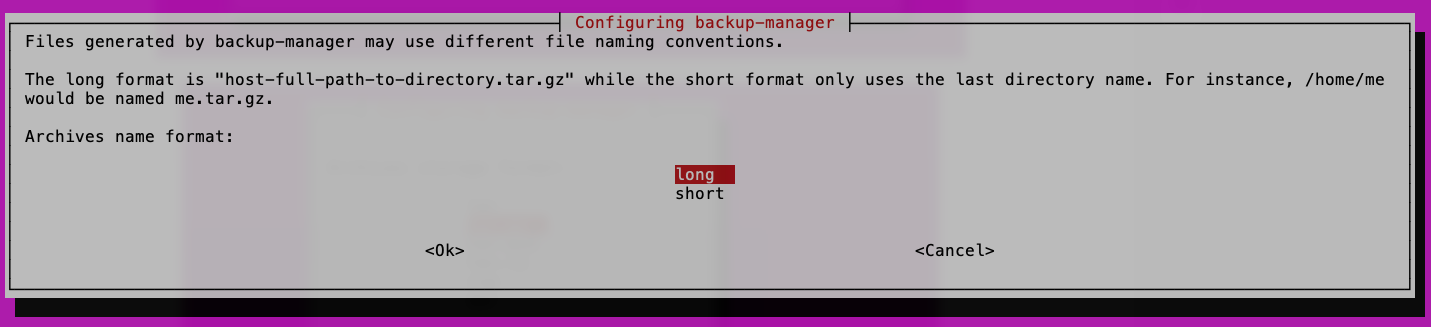
Select the type of archive storage format (.tar.gz is fine):
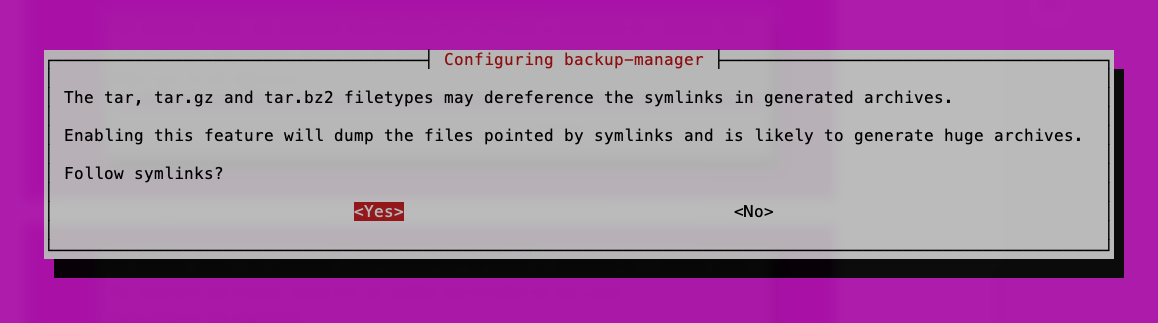
Depending on what you're backing up, there may be symlinks to other directories. You can configure backup-manager to follow them. I recommend enabling this for most cases.
I'd also recommend enabling long archive name format to identify where the backups originate - especially if you've multiple machines that you're backing up. This will also identify the name of the directories being backed up.
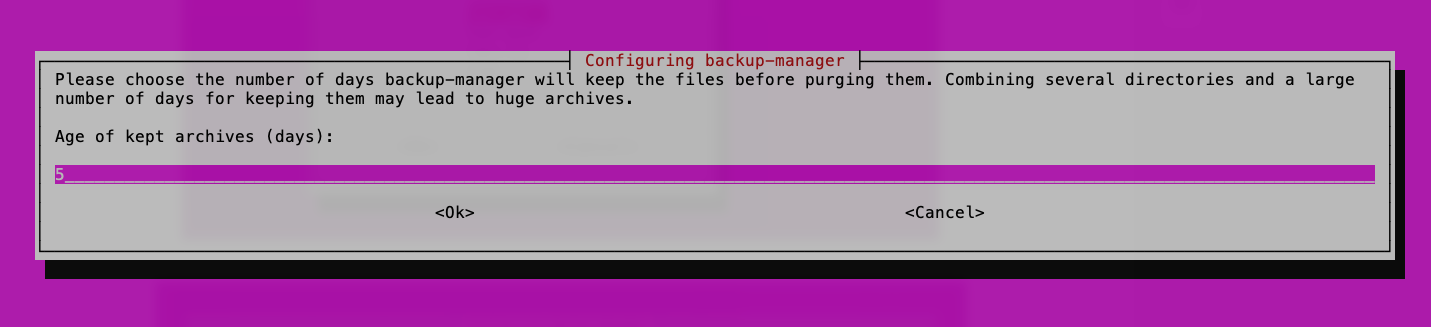
How long do you want to keep backups on the system before they're rotated? 5 days is usually okay.
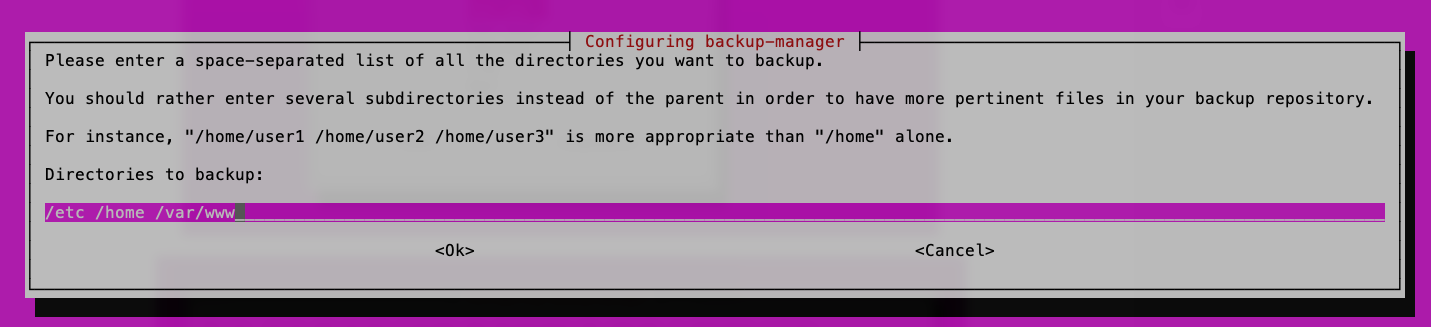
The list of directories that you want backing up. I do not recommend backing up DB directories from MySQL, Postgres, etc. as this can result in consistent backups. Backup-manager has the ability to dump databases at the time of backup - and this is described later in this document.
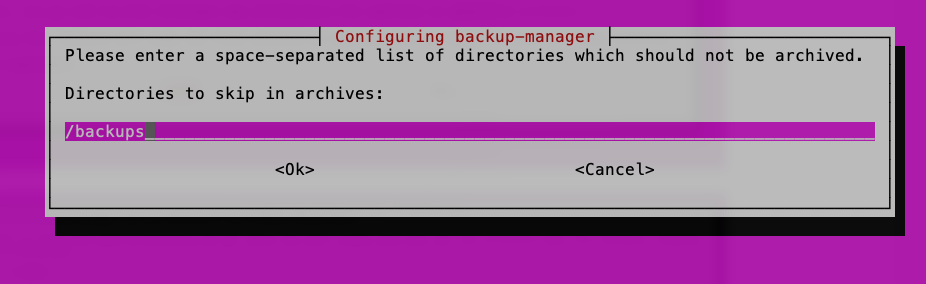
The exclude list of directories that you don't want backing up. It's a good idea to include the backups directory here.
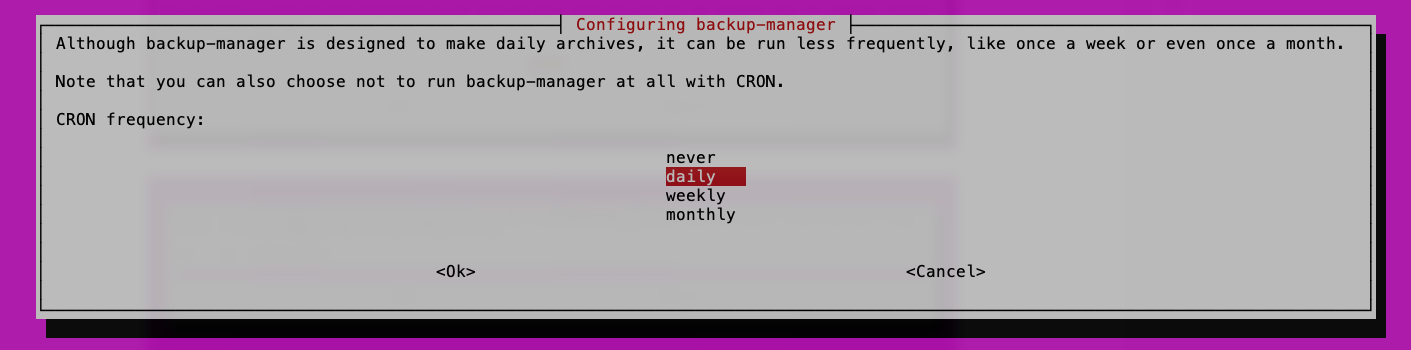
The frequency in which backups are taken are set here. The time is dictacted by the file /etc/crontab, for example:
17 *	* * *	root    cd / && run-parts --report /etc/cron.hourly
25 6	* * *	root	test -x /usr/sbin/anacron || ( cd / && run-parts --report /etc/cron.daily )
47 6	* * 7	root	test -x /usr/sbin/anacron || ( cd / && run-parts --report /etc/cron.weekly )
52 6	1 * *	root	test -x /usr/sbin/anacron || ( cd / && run-parts --report /etc/cron.monthly )
Daily backups are set to run at 6:25am each morning. Weekly, every Sunday at 6:47am. Monthly on the 1st of each month at 6:52am.
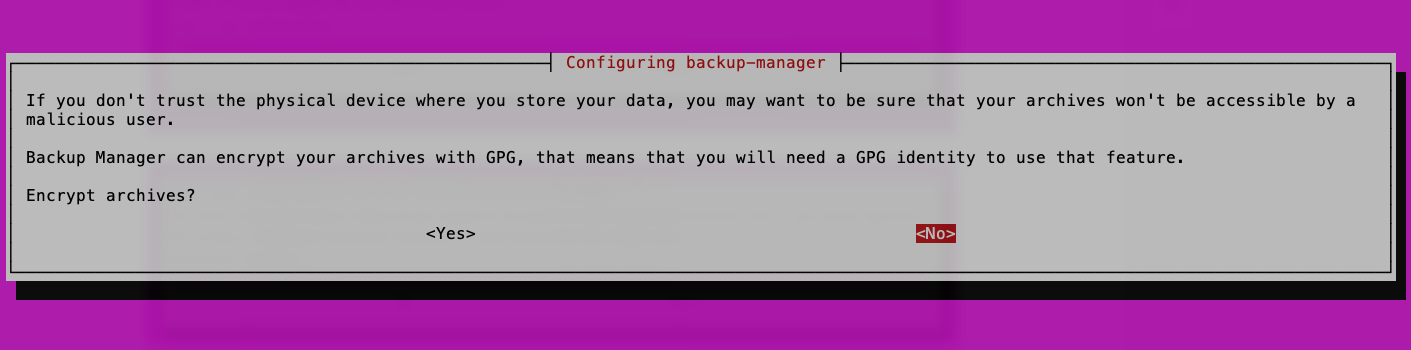
Here you can specify whether you want to encrypt the backups. I do not recommend this.
Backup-manager can also upload backups via FTP or SSH, but I don't recommend this either.

Finally, backup-manager has a built-in disc burning function. Nope.

Database backups via the config file
Backup-manager can be set to dump MySQL-compatible databases by changing a few options in the /etc/backup-manager.conf file.
Look for ths block of code and append mysql to:
export BM_ARCHIVE_METHOD="tarball"so it looks like this:
# The backup method to use.
# Available methods are:
# - tarball
# - tarball-incremental
# - mysql
# - pgsql
# - svn
# - pipe
# - none
# If you don't want to use any backup method (you don't want to
# build archives) then choose "none"
export BM_ARCHIVE_METHOD="tarball mysql"
Go further down the config file and look for the MySQL section. Where:
export BM_MYSQL_DATABASES="__ALL__"change it to look like the following, adding the names of each of the databases that you want to individually back up - otherwise you're taking a big dump of the entire database in one go. Much easier to dump each database individually so that you can restore it much quickly and easily.
You'll also need to provide credentials for a user that has permissions to dump the database. This can be root, though it may be better to create your own backup user for this purpose.
##############################################################
# Backup method: MYSQL
#############################################################

# This method is dedicated to MySQL databases.
# You should not use the tarball method for backing up database
# directories or you may have corrupted archives.
# Enter here the list of databases to backup.
# Wildcard: __ALL__ (will dump all the databases in one archive)
export BM_MYSQL_DATABASES="__ALL__ db1_blog db1_analytics db1_wiki"

# The best way to produce MySQL dump is done by using the "--opt" switch
# of mysqldump. This make the dump directly usable with mysql (add the drop table
# statements), lock the tables during the dump and other things.
# This is recommended for full-clean-safe backups, but needs a
# privileged user (for the lock permissions).
export BM_MYSQL_SAFEDUMPS="true"

# The user who is allowed to read every databases filled in BM_MYSQL_DATABASES
export BM_MYSQL_ADMINLOGIN="root"

# its password
export BM_MYSQL_ADMINPASS="<Password Goes Here>"
Once everything has been done, you can run your first backup by running:
backup-manager &from the command line and watch it populate the contents of /backups. Moving forwards, the backups will run automatically as outlined above as based upon the frequency you've set, and the time defined in /etc/crontab.
Moving backups offsite (rclone & Backblaze R2)
Backblaze B2 set-up
Rclone set-up
It's highly recommended that you download and install rclone directly from the rclone.org website. An easy one-liner to install is the following:
sudo -v ; curl https://rclone.org/install.sh | sudo bashOnce installed, run:
rclone configSetting up a Wordpress site with Ubuntu 22.04 LTS and Cloudflare
Coming (relatively) soon!
Getting Started
Before we can be begin, we need to set up a few basic housekeeping tasks to ensure that we're all good moving forward. This includes setting up the correct timezone, the default text editor, adding a local user that will connect only via SSH and disabling all others - plus locking down root access via SSH.